Monday, November 22, 2010

Quick Dairy Free Chocolate Pudding Pie


Happy Thanksgiving! 

Last night we decided to make a quick chocolate pudding pie. We didn't have our usual camera equipment so we shot this post with an Iphone 3G.

We love chocolate pudding and we love pie crust. This is a super simple recipe and it tastes great!

Also - we researched online for a soy based whipped cream recipe for the pie - so take a look at what we found and some of the ways we modified it! 

We hope you enjoy it and that you have a very happy and safe Thanksgiving!


Emma & Alexa
The Dairy Free Girls


Very simple pudding recipe. Add soy milk to My*T*Fine pudding & Pie filling.
Alexa working the stove! 
 Here is the box
Keebler Ready Graham Crust has no dairy and is delicious! Plus it comes in a pan so it's super easy and no clean up!
 So simple - just add soy milk!
 Alexa had to stir for a while but was a trooper!
Pour pudding in the pie crust and place in the fridge for a few hours.
 Remove to decorate
 Alexa likes Chocolate Chips on her pie. We use Enjoy Life dairy free semi-sweet chips.
These chips are great on ice cream, for cookies - anything!
Since Emma doesn't like chocolate on chocolate [Yep! You read this right - there is such thing as too much chocolate for Emma :)] Alexa decorated just her half of the pie with chips.
 A lot of chips!
Whipped cream! Our mom made a yummy soy based whipped topping. See recipe below!
Blog Pause: Hah! Mom poured whipped cream on Emma's face!
 Emma is half laughing and half licking her face! :)
 Alexa eating up her pie! 
Overall - we loved this pie - it has a rich chocolate taste and you can decorate it in so many ways. We were very excited for our dessert and hope you all like it as much as we had fun making it and eating it. As you can see, there is a lot of extra pie - so we will have leftovers for a few days. Yum!

Soy based whipped cream recipe:


Ingredients:
·         1/4 cup soy milk
·         1/2 cup vegetable oil
·         1 Tablespoon maple syrup
·         1/2 teaspoon real vanilla extract (if you use vanilla soy milk, you can omit this)
Directions:
Place soymilk and 1/4 cup vegetable oil in blender. Blend at highest speed and slowly drizzle in remaining 1/4 cup vegetable oil. Blend in maple syrup and vanilla, add a little more oil if necessary to thicken. This makes enough topping for one pie, or crisp, or angel food cake, or, well you get the picture.

TIPS:
I would go a little lighter on the oil, use confectioners sugar and possibly cut some of the syrup…Also I left it in the blender longer than directed and blended at a higher speed.

ENJOY!
The Dairy Free Girls!


Monday, October 25, 2010

Have a Happy, Safe & Dairy Free Halloween!

Dairy Free Halloween Time!
We love Halloween. We love dressing up, getting together with friends and we LOVE the candy.

We plan Halloween for weeks – the costumes, the friends we will have over, and which houses to go visit for trick or treating…

Emma can eat all types of candy and chocolate - but with Alexa it gets more tricky.

We thought this blog post could help other families with children with MILK allergies – because every kid should have fun trick or treating and get lots of candy!

Here is a blast from the past: A Photo of Alexa and Emma (the princess years) as kids (wait! - we are still kids!) on Halloween!


Enjoy!

Emma & Alexa
The Dairy Free Girls


No Candy

Chocolate – it is safer to not trick or treat for chocolate candy. Some chocolate is possible for Alexa – but the majority of “Halloween” chocolate handed out it MILK chocolate.

Tootsie Rolls – are a no go

Lollipops – Check ingredients! Not all lollipops are OK – we buy DUM DUM Lollipops

Yes Candy

These are our favorites for a Dairy Free Halloween:

 Skittles!
Starbursts!

 Dum Dum Lollipops!
 Gummy Anything! These are worms! Yucky and Yummy!
 Traditional Gummy Bears!
Candy Corn!
 Jelly Beans!
Smarties & Candy Necklaces!


Non candy items are always great: Stickers, rings, tattoos, etc…

Resource: Our Mom buys special things for Alexa at www.veganstore.com on holidays. She likes to keep a stash and pull the pieces out to help add to her trick or treat bag…

If you have additional ideas and resources to help other families – please share and leave us a comment!

Don't forget -  buy non-chocolate/dairy & peanut candy to hand out too in case kids with allergies come by!

Have a Happy Halloween!


Dairy Free Jelly Roll

This is a recipe for a Dairy Free Jelly Roll. Our grandmother makes this dessert for us -  as a Dairy Free recipe, it is a dessert Alexa can eat and we love it...

In Italian it's called: Rotolo Marmellata

It has lots of Jelly and fresh fruit as a garnish - you can change this recipe up in many ways. You can add different types of Jelly (or even pudding or chocolate if you want to make a dairy dessert) and garnish with any type of fruit you want. The main recipe is easy, the ingredients are household ingredients, and it's quick to make. The rolling is a bit tricky - but we did it!

As we continue with this blog - we are styling more and even shooting some of the photos ourselves!

Enjoy!

Emma & Alexa
The Dairy Free Girls
 Alexa styling for the Equipment Shot
 Equipment Shot - Reynolds Wrap Quick Release, Margarine, Cookie Sheet with elevated sides, A Clean Tea Towel
 Emma and Alexa styling the Ingredient Shot
 The Ingredients: Eggs, Sugar, Flour, Jelly, Baking Powder, Fresh Strawberries

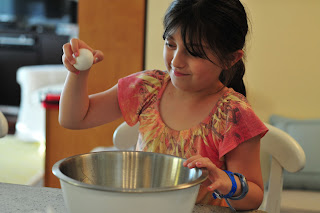
 Alexa cracking eggs - she is now an expert and can do it with one hand! Check out the one handed cracks! Go Alexa go!
Expert! Use 4 eggs 
add 8 tablespoons of sugar to the 4 eggs and whisk until light yellow
 Playing around with close up action shots of falling sugar!
 We like to take turns whisking! Emma....
 And Alexa....
 Checking to see if it's lump-free
 Blog Pause: 
 Emma took over the camera - and shot this photo of Alexa
 This one too of Alexa measuring the baking soda and pouring it in the bowl
Use 2 teaspoons baking powder
 Measuring in the flour. Use 3.5 ounces of Flour
 You need some muscles for this! Mix mix till it's not lumpy!
 Emma preps the foil on the pan for baking
So carefully and precise!
 Alexa gets to grease the pan with the margarine
 4 hands are better than 2! Sister power! Spreading the batter in the pan
 Delicious! Bake for 15-20 mins at 350
 As the cake portion bakes - Take the tea towel and wet it  - Emma is very good at this
 Squeeze out the water!
 As much as you can (More muscles needed here!)
 Lay out the damp towel on a counter top
 Sprinkle sugar around the towel - it will be crystal sugar flavor on the top of the jelly roll
 Emma is using a spoon to sprinkle 
 Pat pat....
 Wash the strawberries (or whatever fresh fruit you will use as a garnish)
 Blog pause - sister love!
 Remove cake from the oven
Turn the cake over on the  damp tea towel covered in sugar sprinkles
 Begin adding Jelly - we used Apricot and Strawberry
 Keep spreading across
 Sharing the work!
 Alexa thought the 3 layers of jelly looked like the flag of Spain :)
 This is the hard part - so Mom came in to help us roll
 Grab the front of the cake and start rolling without rolling up the tea towel
 A bit messy - but Emma helped out and we did it!
 Almost done! Once fully rolled keep the towel over it till it's room temperature. Then remove and begin to garnish
 We did it! OK, now to make it look pretty! 
 Decorate with fresh fruit
Add powdered sugar!
 Beautiful colors!
 Ta dah!
 Time to cut and eat!
 This recipe took us less than 30 minutes! No butter, and plenty of fruit makes this a 
healthier cake alternative!
 Thumbs up from Emma...
Alexa was too busy eating! I guess that's a thumbs up too!